
![]()
Nutrition Experience from the Field of Master Mind Survival (MMSUR)
Shared from the greenhouse of: Joseph Mercado
Article Author: Dr. Helena Gough – Ask A Prepper
To: Survivalist
Blog Post #901
Re: Microgreens – Indoor Farming
Date and Time: Thursday, February 13, 2020 at 12:24 a.m.
Dear Survivalist,
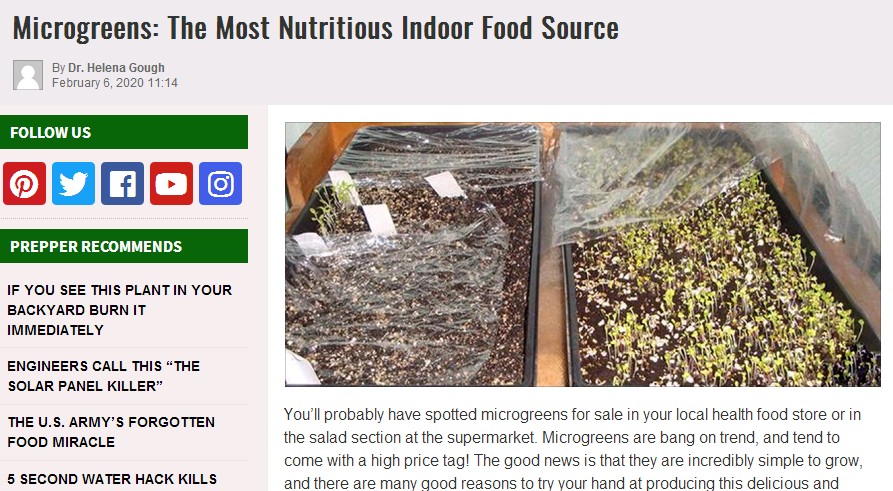
You’ll probably have spotted microgreens for sale in your local health food store or in the salad section at the supermarket. Microgreens are bang on trend, and tend to come with a high price tag!
The good news is that they are incredibly simple to grow, and there are many good reasons to try your hand at producing this delicious and valuable crop.
What are microgreens?
Microgreens are simply the very young seedlings of vegetables, herbs or edible flowers.
Unlike sprouts, microgreens are harvested after the young plant stems have reached a length of one to three inches, and when the first seed leaves (called cotyledons) have formed.
Any entirely edible plant can be grown as a microgreen, but certain varieties are popular because they have a good flavor and color.
Here are some of the most well-liked types of microgreen:
- Beets
- Chard
- Radish
- Mustard
- Kale
- Arugula
- Cress
- Broccoli
- Sunflower
- Watercress
An enjoyable option for the beginner microgreens gardener is to buy a packed of mixed salad seeds or a microgreen seed mix, either of which will provide you with an interesting first harvest of varying tastes and textures.
As you become more comfortable with the process of growing microgreens, you can experiment with a wider range of seeds that will give you a more unusual spectrum of flavors to enjoy.
What are the benefits of growing microgreens?
- Microgreens offer a year-round source of food. Microgreens can be grown at any time of year, giving you a source of fresh greenery even in the depths of winter.
- Microgreens provide a very fast crop. Microgreens have a fast turnaround, being ready to harvest between seven and twenty one days after sowing.
- Micrgreens are nutritionally dense. Microgreens pack all of the vitamins and minerals and polyphenols of a fully grown plant into a much smaller package, giving you many of the nutrients you need with just a modest handful of food.
- Microgreens can be grown easily and with simple equipment. You don’t even need a garden to grow microgreens! At most times of year, microgreens can be grown on a sunny windowsill.
They require limited equipment and minimal maintenance. As they are harvested young, they are rarely troubled by diseases of pests.
Equipment needed for growing microgreens indoor:
- Seeds: opt for one of the more popular microgreen seed types initially.
- Shallow tray: a leftover plastic take-out container is a free and easily available option.
- Potting soil: seeds will germinate best in a fine soil. Go organic if you can afford it!
- Spray bottle/mister: essential for gentle watering of your delicate seedlings.
- South-facing window sill or similar: choose a spot where your seedlings will get adequate sunlight.
Optional extras:
- Tray lid or plastic wrap: some seeds germinate better with a lid or covering. This maintains a higher and more consistent level of humidity when compared to a tray that is left open.
- Grow lights: these need not be expensive, but they will allow you to grow microgreens more consistently during the winter when light levels are lower.
- A grow light can easily be mounted under a kitchen cabinet so your seedling trays can sit on the counter throughout the year.
- Seedling heating mat: this speeds up the germination process, particularly when temperatures drop.
How to grow microgreens indoors:
- Firstly ensure that your tray is clean. If it doesn’t have any drainage holes, begin by poking some holes in the base.
- Spread around an inch of potting soil in the tray, smoothing it out so that is has an even surface. Take care not to compress the soil too much. If the soil is completely dry, spray it with a mister to moisten it.
- Scatter your seed mix evenly onto the soil, making sure that you are not overcrowding them. However, you will be harvesting them young so they do not need as much space as when being grown to full size.
- Cover the seeds with a fine layer of soil. A general rule of thumb is that the finer the seed, the thinner the layer of soil is required to cover them.
- Mist the soil gently but thoroughly. If you have a warm and sunny windowsill, place your tray here ensuring that it will receive a minimum of 4 hours sunlight per day. Alternatively, place them under your grow lights.
- If your tray has a lid, put it on. Plastic wrap can be used as an alternative covering. Many microgreen seedlings will germinate without a covering, so test this out for yourself and see what works best in your home.
- Once your seedlings have sprouted, remove the lid or covering. Continue to mist the soil once or twice a day according to the temperature in your home. Regularly check the soil to ensure it hasn’t dried out.
- Some seeds germinate better with an overnight soaking in water. You can refer to the seed packet or simply experiment with this for yourself.
Harvesting your microgreens:
- Your microgreens are harvested by cutting above soil level using scissors or a well-sharpened knife.
- Some microgreen growers choose to harvest their crop as soon as the first pair of leaves (the cotyledons) have formed.
- Others allow the next pair of true leaves to appear before they harvest.
- There is no hard and fast rule, and it is worth tasting your microgreens at different phases to find the flavor and texture that you enjoy most.
- Wash your microgreens carefully before eating.
Content Source: AskAPrepper.com
Email Us a Message
![]()
 Have a question about this article?
Please send us an email message below and we will serve you momentarily.
Fly Over to the MMU Facebook Page with Hoot

![]()